Reset Your Hydroponic System: A January Tune-Up for Faster Growth in 2026
As the calendar turns to 2026, your hydroponic system might be showing signs of winter fatigue. Algae in the reservoir? Cloudy nutrient solution? Slower growth than last summer?
You’re not alone.
After months of continuous use, even the cleanest systems accumulate mineral buildup, biofilm, and imbalances that quietly reduce plant performance. But just like a car needs an annual service, your hydroponic garden thrives with a fresh start in January.
This isn’t about replacing equipment — it’s about resetting, refreshing, and optimizing so you can grow faster, cleaner, and more efficiently this year.
In this guide, you’ll discover:
- A step-by-step tune-up checklist
- How to deep-clean every component safely
- Tips to prevent algae, clogs, and pH swings
- Why this small effort leads to bigger harvests
Let’s get your system humming again — ready for peak performance in spring.
🔧 Why Your Hydroponic System Needs a January Reset
Hydroponics is powerful because it delivers nutrients directly to roots — but over time, those same nutrients leave behind residues.
Mineral deposits coat pumps, tubing gets clogged with biofilm, and old solutions develop microbial imbalances. Even if everything looks fine, your plants may be working harder than they should.
A January tune-up ensures:
- Better oxygenation
- Smoother water flow
- More accurate pH and EC readings
- Fewer pests and diseases
- Healthier, faster-growing plants
According to the University of Arizona Controlled Environment Agriculture Center, routine maintenance increases hydroponic yields by up to 30% over time.
So don’t wait for something to break. Prevent it before it happens.
🛠️ Step-by-Step: The 2026 Hydroponic Tune-Up
Step 1: Turn Off & Drain Everything
- Unplug lights, air pump, and any timers.
- Drain all nutrient solution from reservoirs.
- Remove net cups, growing media (rockwool, clay pebbles), and plants if harvesting.
📌 Tip: Use this moment to take notes: What grew well? What didn’t?
Step 2: Disassemble Components
Take apart:
- Reservoir lid
- Tubing
- Air stones
- Submersible pump
- Spray nozzles (for aeroponics or NFT)
Label parts if needed to remember reassembly.
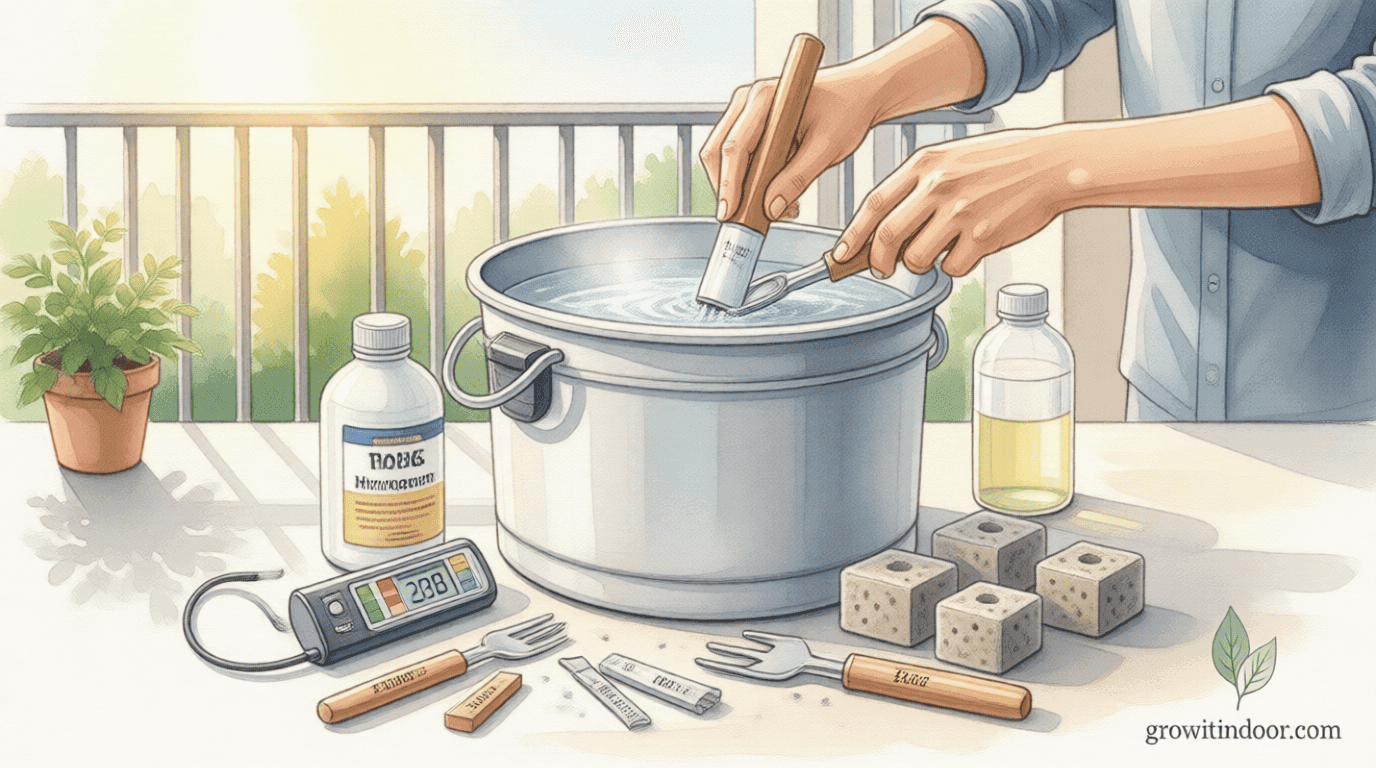
Step 3: Deep-Clean Each Part
Use a 3% hydrogen peroxide solution (H₂O₂) — safe, effective, and breaks down into water and oxygen.
| Component | Cleaning Method |
|---|---|
| Reservoir | Scrub inside with H₂O₂ + soft brush. Rinse thoroughly. |
| Tubing | Soak in H₂O₂ for 1–2 hours. Flush with water. |
| Air stones | Soak overnight — restores airflow. |
| Pump | Wipe exterior; do not submerge motor. |
| Net cups & trays | Scrub with H₂O₂, rinse well. |
🚫 Never use bleach or soap — they leave toxic residues harmful to plants.
Step 4: Inspect & Replace Worn Parts
Check for:
- Cracked tubing
- Clogged spray nozzles
- Faded wires
- Corroded connectors
Replace air stones every 3–6 months for optimal oxygen delivery.
📌 Pro Tip: Keep spare O-rings, tubing, and net cups on hand.
Step 5: Reassemble & Refill
Once dry:
- Reconnect all parts securely.
- Place clean growing media back into net cups.
- Add fresh seedlings or transplant healthy cuttings.
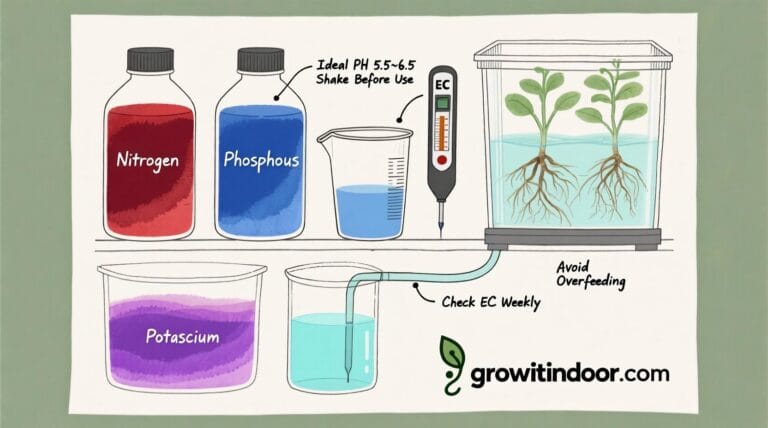
For new nutrient mix:
- Use reverse osmosis or filtered water if tap water is hard.
- Follow brand instructions (e.g., General Hydroponics Flora Series).
- Adjust pH to 5.5–6.5 using pH Up/Down.
- Check EC for correct strength.
💡 Set a reminder: Schedule your next full clean for June.
Step 6: Monitor for First 7 Days
After restart:
- Check pH daily (first week)
- Watch for foaming (sign of organic buildup)
- Ensure air bubbles are strong and steady
- Look for new root growth within 3–5 days
Healthy white roots = success.
🌿 Internal Link: Hydroponic pH & EC Management: Unlock Explosive Growth
🔄 Pro Tips for Long-Term Success
- Add beneficial bacteria after cleaning (e.g., Hydroguard) to protect roots.
- Use reservoir covers to block light and prevent algae.
- Keep a logbook with dates, pH, EC, and observations.
- Rotate crops to avoid nutrient depletion.
❌ Common Mistakes to Avoid
- Skipping the clean because “it still works”
→ Slow decline leads to sudden failure. - Using tap water without testing
→ Chlorine and minerals affect pH stability. - Reusing dirty growing media
→ Risk of pathogens and clogging. - Not checking air pump output
→ Weak bubbles = poor root health.
✅ Printable Hydroponic Tune-Up Checklist
| Task | Done? |
|---|---|
| Turn off and drain system | ☐ |
| Remove all components | ☐ |
| Clean reservoir with H₂O₂ | ☐ |
| Soak tubing and air stones | ☐ |
| Inspect for damage | ☐ |
| Replace worn parts | ☐ |
| Reassemble and refill | ☐ |
| Test pH and EC | ☐ |
| Restart system | ☐ |
| Monitor first 7 days | ☐ |
📥 Download PDF version → [Link to be added]
💡 Final Thought: A Clean System Is a Happy System
Your hydroponic setup is more than equipment — it’s a living ecosystem.
And like any relationship, it thrives on care, attention, and occasional renewal.
By giving it a fresh start in January, you’re not just cleaning pipes.
You’re making space for stronger roots, greener leaves, and fuller harvests.
So let 2026 be the year your garden doesn’t just grow —
it flourishes.