Grow Basil Hydroponically with the Kratky Method

Want fresh, aromatic basil year-round—for pesto, pasta, or caprese salads—but hate the mess of soil and the hassle of watering?
Growing basil hydroponically with the Krattky method is the cleanest, simplest way to cultivate lush, vibrant basil indoors—without pumps, electricity, or complex systems.
Developed by Dr. Bernard Krattky, this passive hydroponic method is perfect for beginners, apartment dwellers, and anyone who wants fresh herbs on demand.
In this guide, you’ll learn exactly how to grow basil hydroponically using jars, nutrient water, and a few basic supplies. No prior experience needed.
Why Grow Basil Hydroponically?
Basil is one of the most popular culinary herbs—but it’s also one of the hardest to keep alive in soil over time. It’s prone to overwatering, fungal diseases, and nutrient depletion.
Hydroponics eliminates these problems. In a soil-free system , basil receives perfect moisture balance, constant nutrients, and better root oxygenation.
As a result, hydroponic basil grows faster, stays healthier, and tastes stronger than soil-grown plants.
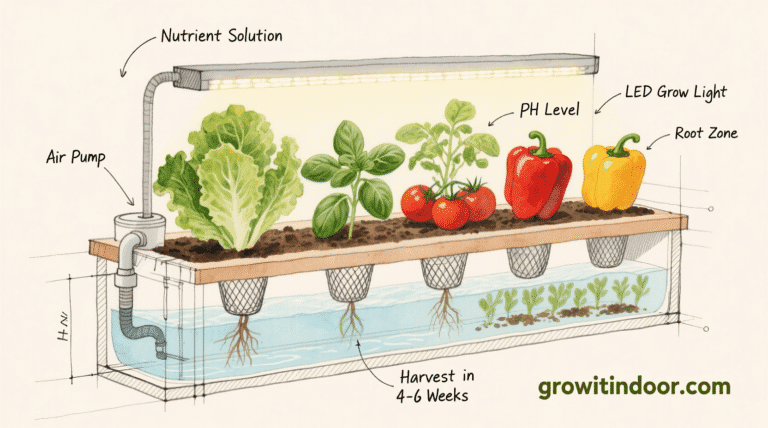
What Is the Krattky Method?
The Krattky method is a passive hydroponic system where the plant’s roots are partially submerged in nutrient water, and the upper roots remain in air. There’s no pump, timer, or electricity required.
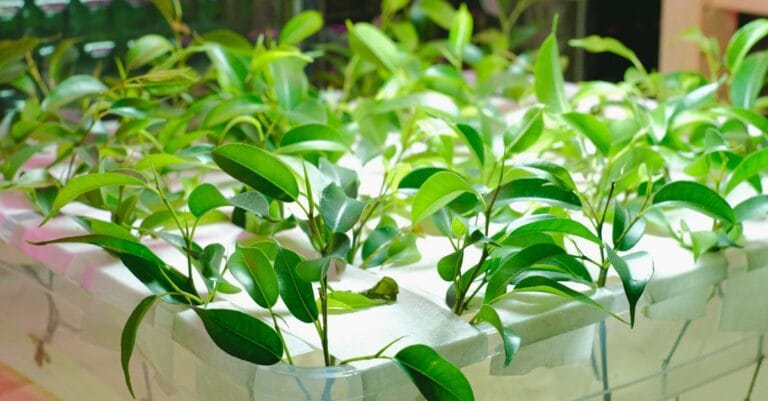
It’s ideal for leafy greens and herbs like basil, lettuce, and cilantro.
Supplies You’ll Need
1. Container
Use a mason jar (quart size) or a 2–3 gallon plastic container. If clear, wrap it in foil to block light and prevent algae.
2. Net Cup
A 2–3 inch cup holds the plant. You can buy one or make a DIY version.
3. Growing Medium
Rockwool cubes, clay pebbles, or coco coir plugs work well.
4. Basil Seedlings
Start from seed or buy organic seedlings. Genovese, Sweet Thai, or Lemon Basil are excellent choices.
5. Hydroponic Nutrient Solution
Use a balanced formula like General Hydroponics Flora Series. Mix at half strength.
6. pH Test Kit
Maintain pH between 5.5 and 6.5. Adjust with pH up/down if needed.
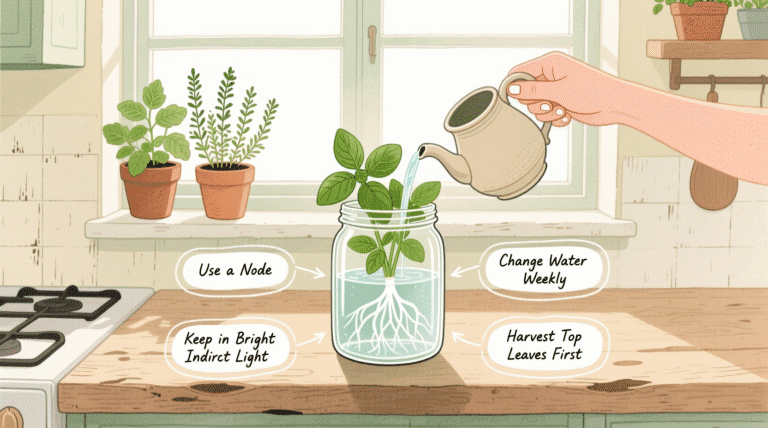
Step-by-Step: Grow Basil Hydroponically
Step 1: Prepare the Seedling
Soak a rockwool cube in pH-balanced water. Insert a basil seed and keep it warm and bright until 2–3 true leaves appear.
Step 2: Set Up the Container
Fill the jar ⅔ full with water and nutrients. Do not fill to the top.
Step 3: Insert Net Cup
Place the seedling in the net cup. Add clay pebbles for support. Float the cup so roots touch the water.
Step 4: Provide Light
Place in a south-facing window or under a full-spectrum LED (12–14 hours/day).
Step 5: Let It Grow
Do not add water or nutrients for 4–6 weeks. Roots will grow into the water while the top stays dry.
Step 6: Harvest
Start picking outer leaves at 6–8 inches tall. Never remove more than ⅓ of the plant.
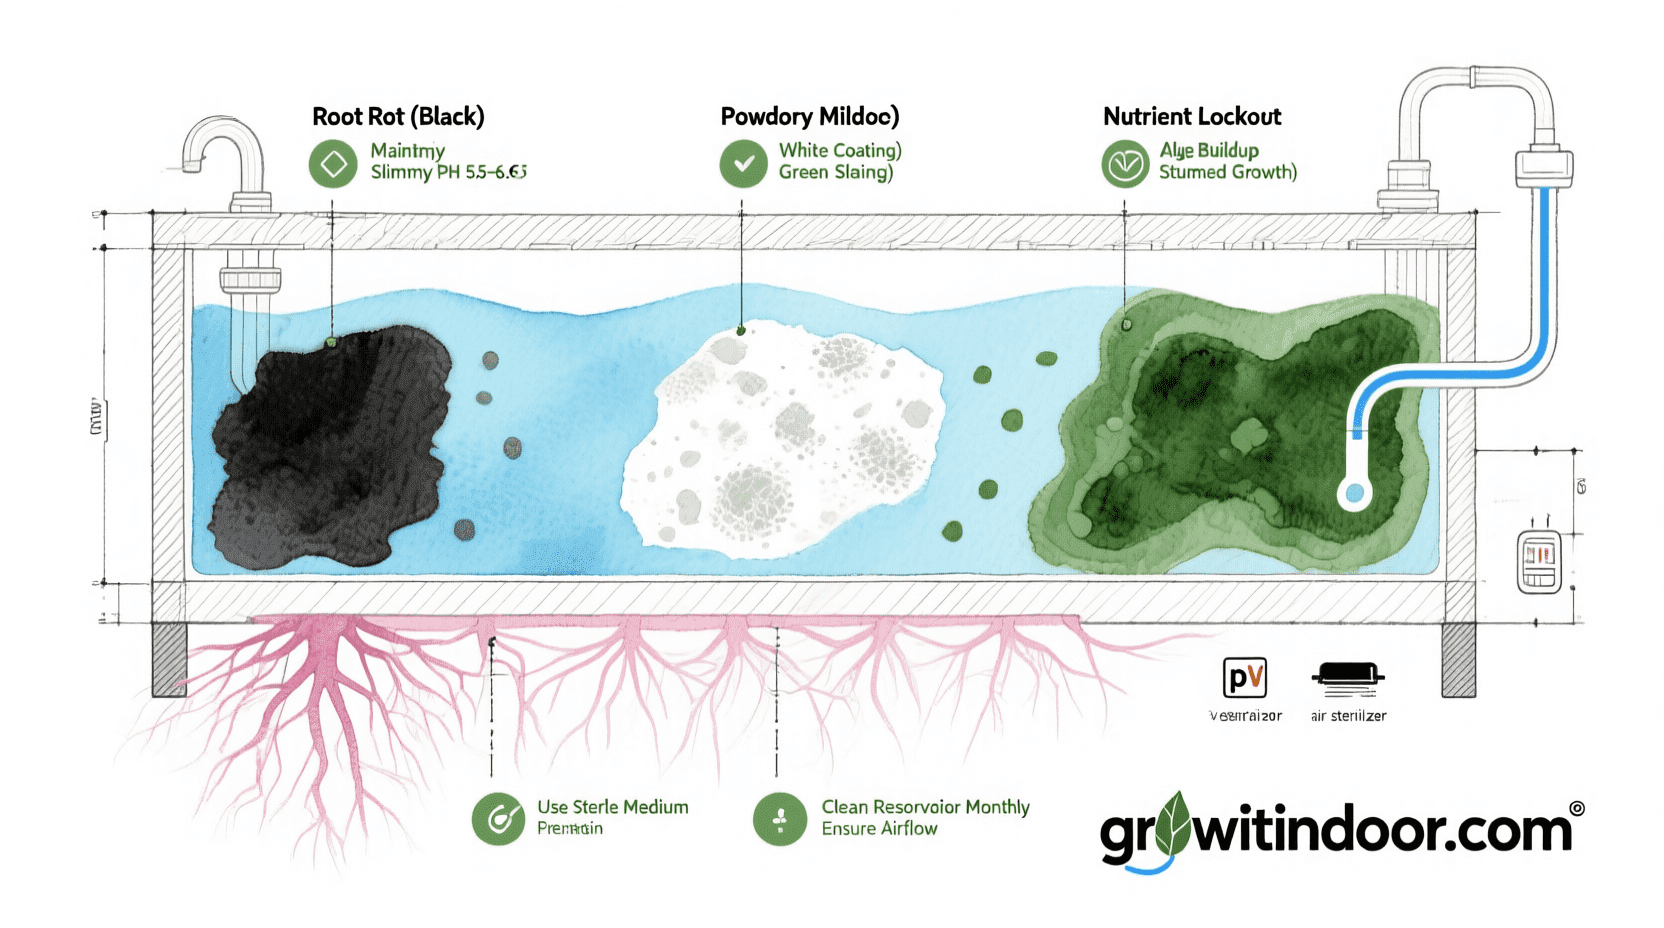
Care Tips and Troubleshooting
💧 Water & Nutrients
Top off with nutrient solution as water evaporates. Replace fully every 6–8 weeks.
☀️ Light
Minimum 6 hours of direct light. Use LEDs for consistent growth.
🌡️ Temperature
Keep between 70–80°F. Avoid cold drafts.
🐛 Pest Prevention
Rinse leaves weekly. Wipe with diluted neem oil if needed.
Final Thoughts
You don’t need a farm, a pump, or even soil to grow fresh basil. With the Krattky method , a mason jar, and a few simple supplies, you can enjoy aromatic, homegrown basil year-round—right on your kitchen counter.
Build your first hydroponic basil jar today. Snip your first leaf tomorrow. And taste the future of home gardening.


I don’t think the title of your article matches the content lol. Just kidding, mainly because I had some doubts after reading the article.
I don’t think the title of your article matches the content lol. Just kidding, mainly because I had some doubts after reading the article. https://www.binance.com/register?ref=IHJUI7TF
I don’t think the title of your article matches the content lol. Just kidding, mainly because I had some doubts after reading the article. https://accounts.binance.com/id/register-person?ref=UM6SMJM3
Your article helped me a lot, is there any more related content? Thanks! https://accounts.binance.com/register-person?ref=QCGZMHR6
I don’t think the title of your article matches the content lol. Just kidding, mainly because I had some doubts after reading the article.
Thanks for sharing. I read many of your blog posts, cool, your blog is very good.
Your article helped me a lot, is there any more related content? Thanks! https://accounts.binance.bh/register/person?ref=IXBIAFVY
Your article helped me a lot, is there any more related content? Thanks! https://accounts.binance.info/register/person?ref=IHJUI7TF