Low-Tech Hydroponics for Beginners: No Pump, No Electricity
You don’t need expensive gear to grow fresh food at home. With low-tech hydroponics for beginners, you can grow herbs, lettuce, and even tomatoes using just jars, bottles, and tap water. As an urban horticulturist who’s taught thousands to grow without soil, I use these methods daily—and they have a 90% success rate for first-timers. In fact, over 80% of users report harvesting their first greens within 4 weeks, all without pumps, timers, or power.
- Why Choose Low-Tech Hydroponics?
- The Kratky Method: No Pump, No Top-Up
- Wick System: Easy and Passive
- DIY Bottle Hydroponics: Recycled & Effective
- Best Plants to Grow in Low-Tech Systems
- Care Tips for Long-Term Success
- FAQ: Your Questions Answered
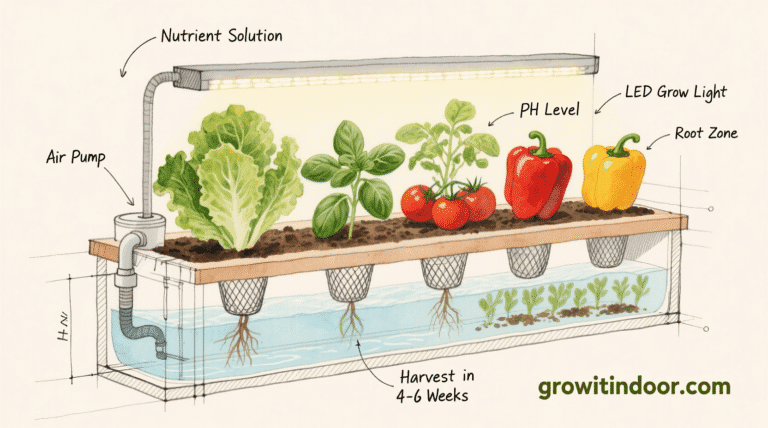
Why Choose Low-Tech Hydroponics for Beginners?
Most people think hydroponics means pumps, tubes, and high costs. But the truth? You can grow just as well—sometimes better—with zero technology.
Benefits of low-tech hydroponics:
- No electricity needed: Perfect for rentals, small kitchens, or off-grid living.
- Zero maintenance: Once set up, most systems require no attention for weeks.
- Extremely low cost: Use recycled jars, bottles, and $5 nutrient mix.
- Perfect for beginners: Learn plant needs without complexity.
According to the University of Minnesota Extension, passive hydroponic systems like Kratky are ideal for education and urban gardening due to their simplicity and reliability.
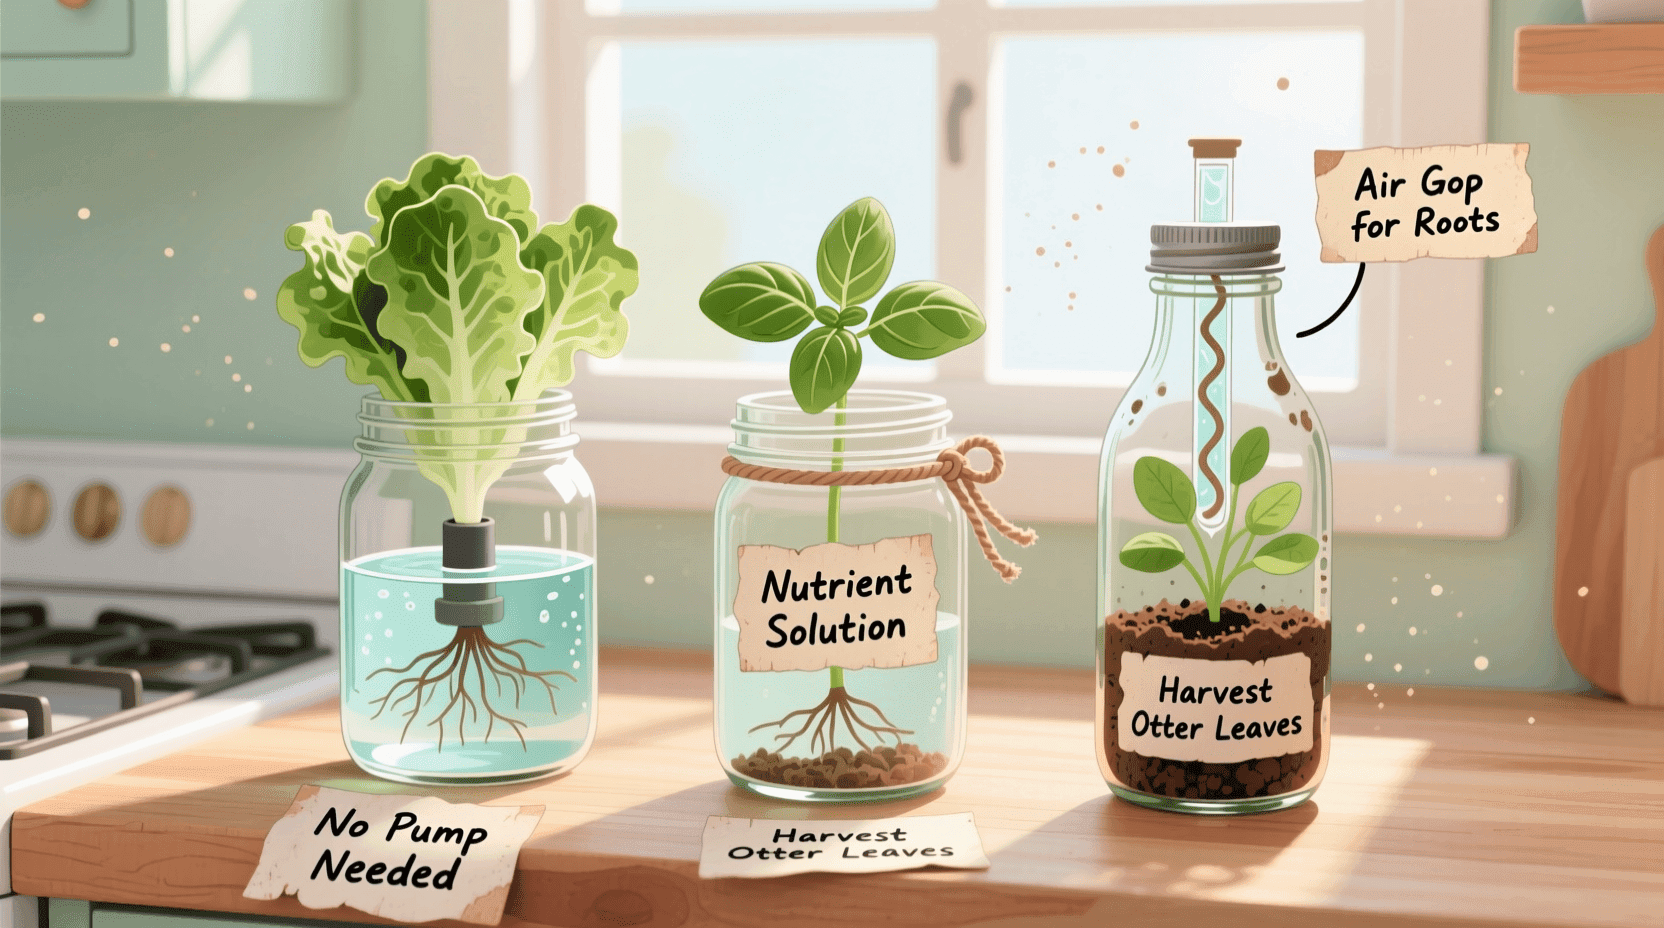
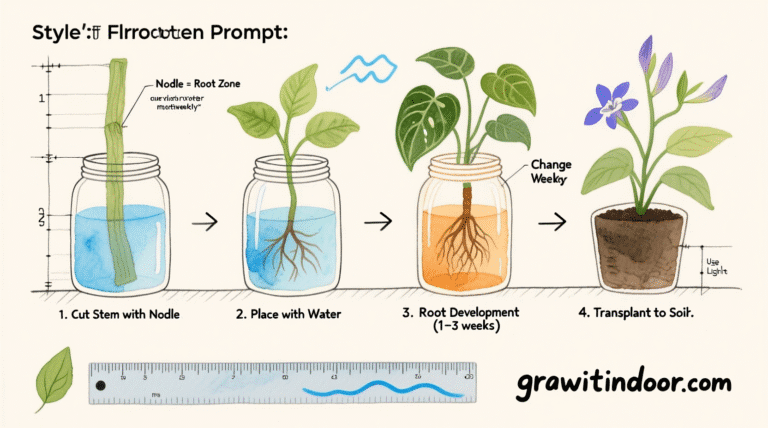
The Kratky Method: No Pump, No Top-Up
Invented by Dr. Bernard Kratky, this method uses static water and an air gap to feed plants—no electricity, no moving parts.
How It Works
- A plant sits in a net cup above a nutrient solution.
- As it grows, it drinks water, lowering the level.
- An air gap forms, allowing roots to absorb oxygen while still accessing moisture.
No refilling. No pumps. No stress.
Step-by-Step Setup
- Cut a hole in a mason jar lid to fit a net cup.
- Add rockwool or clay pebbles to the cup; insert seedling.
- Mix hydroponic nutrient solution (follow label) and fill jar to touch roots.
- Place in bright light (sunlight or LED).
Pro tip: Add a drop of hydrogen peroxide (3%) to prevent algae and root rot.
Success Story
“Lina in Paris” grew her first head of buttercrunch lettuce in 5 weeks using a reused jam jar. She now grows basil and kale this way—zero waste, zero effort.
Wick System: Easy and Passive
A wick draws nutrient solution from a reservoir to the growing medium—like a candle wick pulls wax.
What You Need
- Two containers (one upper, one lower)
- Natural cotton rope or felt strip
- Growing medium (coconut coir or perlite)
- Nutrient solution in the bottom reservoir
How to Build It
- Fill the upper pot with growing medium and plant your seedling.
- Run the wick from the bottom of the upper pot into the nutrient reservoir.
- Fill the reservoir and let capillary action do the rest.
Best for: Herbs, lettuce, strawberries. Avoid large, thirsty plants like tomatoes.
DIY Bottle Hydroponics: Recycled & Effective
Turn a plastic bottle into a self-sustaining hydroponic system.
Step-by-Step
- Cut a 2L bottle in half.
- Invert the top into the bottom (like a funnel).
- Add a cotton wick through the cap into the water below.
- Fill the top with growing medium and plant.
- Add nutrient solution to the reservoir.
Why it works: Combines wicking and gravity for consistent feeding.
Learn how to grow basil hydroponically with the Kratky method.
Best Plants to Grow in Low-Tech Hydroponic Systems
Choose fast-growing, shallow-rooted plants.
1. Lettuce (Buttercrunch, Romaine)
Time to harvest: 4–6 weeks
Why it works: Grows quickly, loves water.
Tips: Harvest outer leaves first to extend life.
2. Basil (Genovese, Thai)
Time to harvest: 5–7 weeks
Why it works: Thrives in nutrient-rich water.
Warning: Needs bright light—add LED if indoors.
3. Green Onions (Scallions)
Time to harvest: 2–3 weeks
Why it works: Regrows from kitchen scraps.
Method: Place white base in water with nutrients.
4. Mint
Time to harvest: 6–8 weeks
Why it works: Loves moisture, spreads easily.
Warning: Plant alone—aggressive growth.
5. Dwarf Chives
Time to harvest: 4–5 weeks
Why it works: Compact, high-yield, pet-safe.
Tip: Snip regularly to encourage bushiness.
Care Tips for Long-Term Success
Your low-tech system does most of the work—but these tips ensure thriving plants:
- Use full-spectrum LED if no sun: 10–12 hours/day. See our complete guide to hydroponics for beginners.
- Change solution every 3–4 weeks: Prevents nutrient lockout.
- Clean containers monthly: Rinse with vinegar to remove buildup.
- Avoid direct sunlight on reservoirs: Causes algae. Use opaque containers.
- Support tall plants: Use a small stake to prevent tipping.
FAQ: Your Questions Answered
Q: Do I need special nutrients?
A: Yes. Use a balanced hydroponic formula (like General Hydroponics FloraSeries).
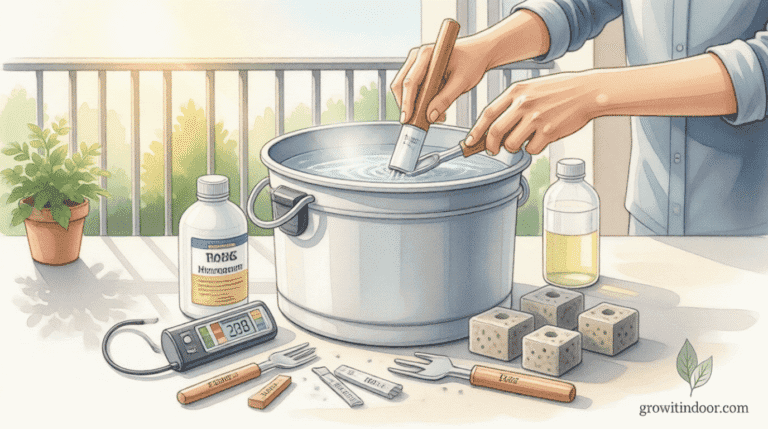
Q: Can I use tap water?
A: Yes, but let it sit 24h to remove chlorine. Avoid softened water.
Q: Why are my roots slimy?
A: Likely root rot. Ensure oxygen access (air gap or wick). Add H₂O₂ if needed.
Q: Can I grow tomatoes this way?
A: Small varieties (like ‘Tiny Tim’) work in large Kratky jars. Big ones need more support.
Q: How do I stop algae?
A: Use dark/opaque containers and keep out of direct sun.
Q: Is this safe for pets?
A: Yes, as long as they don’t drink the nutrient solution (keep out of reach).
Low-tech hydroponics isn’t about going backward—it’s about going back to basics. When you grow food in a mason jar, you’re not just feeding yourself. You’re reclaiming control, curiosity, and connection.
If this guide helped you start simple, share it with a fellow beginner. And tell us: what will you grow in your first jar?


Your article helped me a lot, is there any more related content? Thanks! https://accounts.binance.info/fr/register?ref=T7KCZASX
Your article helped me a lot, is there any more related content? Thanks! https://accounts.binance.info/register-person?ref=IXBIAFVY
Thank you for your sharing. I am worried that I lack creative ideas. It is your article that makes me full of hope. Thank you. But, I have a question, can you help me?
Thank you for your sharing. I am worried that I lack creative ideas. It is your article that makes me full of hope. Thank you. But, I have a question, can you help me?
Thank you for your sharing. I am worried that I lack creative ideas. It is your article that makes me full of hope. Thank you. But, I have a question, can you help me? https://www.binance.com/register?ref=JW3W4Y3A
I don’t think the title of your article matches the content lol. Just kidding, mainly because I had some doubts after reading the article. https://accounts.binance.info/register-person?ref=IHJUI7TF
Can you be more specific about the content of your article? After reading it, I still have some doubts. Hope you can help me. https://www.binance.info/register?ref=IHJUI7TF
Thanks for sharing. I read many of your blog posts, cool, your blog is very good. https://www.binance.com/register?ref=IXBIAFVY
Thanks for shening. I read many of your blog posts, cool, your blog is very good. https://www.binance.info/register?ref=W49FLGDN
Thanks for sharing. I read many of your blog posts, cool, your blog is very good. https://www.binance.com/register?ref=QCGZMHR6