How to Grow Microgreens: Pure Windowsill Abundance.

If you want fresh, nutrient-packed greens but have no garden, no balcony, and no experience—growing microgreens on a windowsill is your best solution.
Microgreens are baby vegetable greens harvested just 7–14 days after germination. They’re up to 40 times more nutrient-dense than mature plants and can be grown with nothing more than a sunny windowsill, water, and basic household items.
In this guide, you’ll learn how to grow microgreens without soil, tools, or special equipment—perfect for apartment dwellers, students, and busy professionals.
Let’s get growing.
What Are Microgreens and Why Grow Them on a Windowsill?
Microgreens are the young shoots of vegetables and herbs like broccoli, radish, sunflower, and basil. They’re harvested when the first true leaves appear—usually between 7 and 14 days after planting.
Unlike sprouts, which grow entirely in water, microgreens grow in a medium and are cut above the soil line—making them safer and more flavorful.
Benefits of Growing Microgreens on a Windowsill:
- Ready in 1–2 weeks – Faster than any other homegrown food
- Super nutrient-dense – High in vitamins C, E, K, and antioxidants
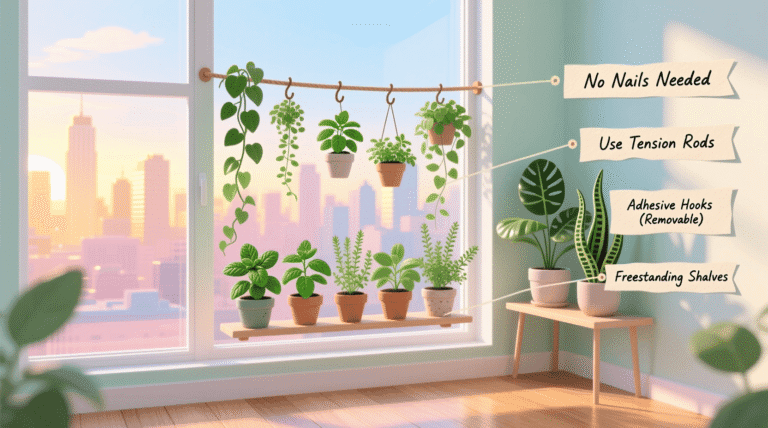
- No garden needed – Grow on any sunny sill
- No soil required – Use paper towels or hemp mats
- Low cost – One seed packet yields multiple harvests
- Fresh flavor – Harvest and eat within minutes
They’re perfect for salads, sandwiches, smoothies, and garnishes.
🔗 Learn more about microgreens nutrition – Journal of Food Composition and Analysis
Best Seeds for Windowsill Microgreens
Not all seeds work well as microgreens. Choose varieties bred for fast germination and great flavor.
Top 8 Microgreen Varieties for Beginners
| Broccoli | Mild, slightly peppery | 7–10 | High in sulforaphane |
| Radish | Spicy, zesty | 6–9 | Fast germinator |
| Sunflower | Nutty, crunchy | 10–12 | Remove hulls before eating |
| Pea Shoots | Sweet, fresh | 8–12 | Juicy and tender |
| Kale | Earthy, mild | 10–14 | Rich in vitamins A, C, K |
| Arugula | Peppery, bold | 7–10 | Adds punch to dishes |
| Cilantro | Citrusy, bold | 10–14 | Great for salsas |
| Mustard | Hot, spicy | 7–10 | Mix with milder greens |
Use untreated, food-grade seeds labeled for microgreens or sprouting.
Supplies You’ll Need
You don’t need expensive tools. Here’s everything required to start.
1. Growing Container
- Shallow tray or recycled container (e.g., berry clamshell)
- Size: 10×20 inches or smaller
- Must have drainage (poke holes if needed)
2. Growing Medium
Choose one of these soil-free options:
- Paper towels – Free, simple, short-term
- Hemp mat – Reusable, mess-free
- Cotton pads – Great for beginners
- Coconut coir – Organic, moisture-retentive
Avoid garden soil—it’s too dense and may carry pathogens.
3. Seeds
Buy from reputable suppliers like True Leaf Market or Johnny’s Selected Seeds.
4. Spray Bottle
For gentle misting during germination.
5. Light Source
- South-facing window – 6+ hours of direct sun
- East/west window – 4–6 hours of indirect sun
- No sun? Use a full-spectrum LED (12–14 hours/day)
🔗 How to choose grow lights – University of Minnesota Extension
Step-by-Step: Grow Microgreens on a Windowsill
Follow this process for consistent, healthy harvests.
Step 1: Prepare the Container
- Line with 2–3 layers of paper towel or cotton pad
- Wet thoroughly with clean water
- Drain excess water
Step 2: Sow the Seeds
- Evenly sprinkle seeds across the surface
- For small seeds (radish, broccoli): ~1 tbsp per tray
- For large seeds (sunflower, pea): ~2–3 tbsp
💡 Tip: Use a salt shaker for even distribution.
Step 3: Mist and Cover
- Mist lightly to settle the seeds
- Cover with another tray or plate to block light
- Place in a warm, dark spot (70–75°F)
Step 4: Germinate in the Dark
- Check daily and mist if surface dries
- Most seeds germinate in 2–4 days
Remove the cover as soon as green shoots appear.
Step 5: Provide Light
- Move to a sunny windowsill or under grow light
- Keep lights 6–12 inches above greens
- Rotate tray daily for even growth
Step 6: Water from Below
- Pour water into a tray underneath
- Let the medium wick moisture upward
- Avoid spraying leaves after germination
Keep the medium moist but not soggy.
Step 7: Harvest
- Microgreens are ready when first true leaves open
- Use clean scissors to cut just above the surface
- Harvest in the morning for peak flavor
How to Harvest and Store Microgreens
Harvesting Tips:
- Cut with sharp scissors to avoid crushing stems
- Harvest only what you need—microgreens don’t store well
- Rinse gently if grown on coir or soil
- Pat dry with a paper towel
Storage:
- Place in an airtight container with a dry paper towel
- Store in the refrigerator
- Use within 3–5 days for best flavor
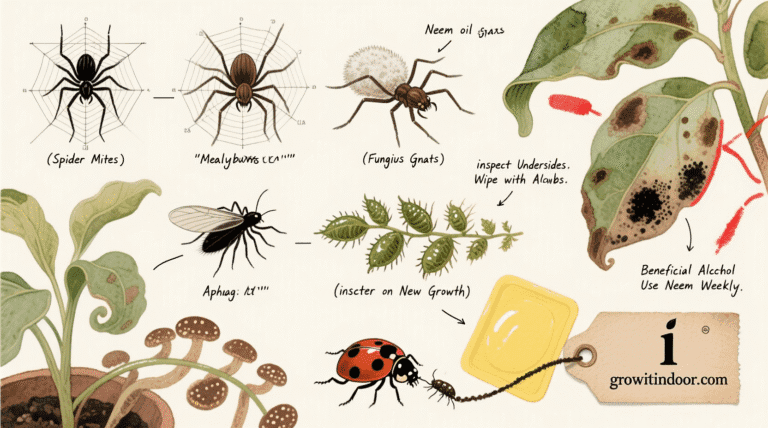
Common Problems and How to Fix Them
1. Mold or Fuzz on Surface
Cause: Overcrowding, poor airflow, overwatering
Fix: Reduce seed density, improve air circulation, water from below
2. Leggy, Weak Growth
Cause: Insufficient light
Fix: Move closer to window or increase grow light duration
3. Seeds Not Germinating
Cause: Old seeds, dry medium, cold temperatures
Fix: Use fresh seeds, keep warm and moist, cover during germination
🔗 Troubleshooting microgreens – University of Vermont Extension
Final Thoughts
Growing microgreens on a windowsill is one of the easiest, most rewarding ways to bring fresh, living food into your home—no matter how small your space.
With a tray, some seeds, and a little light, you can harvest nutrient-packed greens in under two weeks. They add flavor, color, and vitality to meals.
Start with radish or broccoli. Follow the steps. Harvest your first crop.
And soon, you’ll never buy bagged greens again.


I don’t think the title of your article matches the content lol. Just kidding, mainly because I had some doubts after reading the article. https://www.binance.com/register?ref=IXBIAFVY
Your point of view caught my eye and was very interesting. Thanks. I have a question for you.